Posted on

Wayne’s way – Diagonal Stay Assembly

In our new WIRED feature, NZFC committee member and competition judge Wayne Newdick shares his tips and tricks on the fundamentals of fence construction. First up, the Diagonal Stay Assembly.

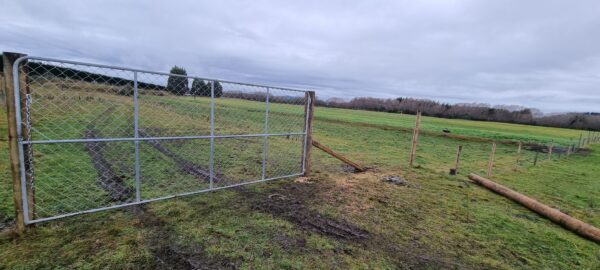
This is probably the most important part of fence construction and this method might be a bit controversial but this is how I do it. I’ve fitted 90-odd of these in the past 2 weeks. 

What to use

  • 2.4 Rnd 125-135 being ideal for strainer assemblies
  • ¼ Rnd are suitable if selected for size. 125 plus face and check for knots.
  • 1.8 ¼ Rnds are fine for most angles 2.4 only for sharp angles.
  • Block half of a 1.8 No 1 half Rnd 200mm face is sufficient in most soil types 1200mm or so for softer ground don’t forget to ram behind the block.

Method

  • Cut the stay standing in front of the stay, all cuts should be the same length 250 -300mm.
    I use a small block plane 200mm long to dress and remove most of the saw marks.

Fitting

  • Put the stay in place, height being approx half way between the ground and the top of the strainer between the wires closer to the upper wire.
  • Scribe around the stay and mark the block with a spade at the same time.
  • I always allow 20 – 30mm to be cut off the end of the stay.
  • Remove stay and dig block trench, place block in then cut stay trench.

Mortice

  • I always use a saw here. Simply cut below the top horizontal line and below the bottom line 20mm in.
  • I then use a thin chisel to cut the vertical lines and simply use the claw of my hammer to flick the wood out. Quick and easy and safe.


Fitting the stay to the block

  • Put the stay in the mortice and lay on the block, check for plumb, cut the end off the stay to the desired length, at the same time cut a small nick underneath the stay and small flat on top of the stay. (45deg)
  • At this stage I use the back of my spade driving it into the block just behind the stay and simply lever it into place. I don’t use a rammer.
  • This method is quick and powerful but does require a strong spade.


Summary

  • Don’t be afraid to use a good ¼ Round stay
  • Don’t be shy of using a saw on the horizontal cuts for the mortice
  • 1.8 post is fine for angles

Written by Wayne Newdick 

Wayne Newdick is a notable top fencer, widely recognised in the industry for his high standards and ingenuity.

Read WIRED online

Follow us on Facebook

© Fencing Contractors Association NZ (FCANZ)

Posted on

How to: Cantilever Retaining Walls

In our third instalment of our focus on retaining walls, Nick Liefting takes us through the complexities of Cantilever walls.

This type of wall, in simple terms, is one that has a bending moment at ground level, and is commonly a piled wall. Piles can be:

  • Timber Pole, round or square
  • Steel I beams or U beams
  • Cast-in-situ concrete
  • Precast concrete

This is the quickest wall to construct and is generally the most cost effective, however, to qualify for a cantilever wall, it must have firm ground to drill into, to the required depth for the respective wall heights.

Timber Pole

The most common are round poles, which come as a SED or Unilog. The SED has a small end diameter which is placed above ground. The Unilog is a pole spun to a uniform diameter over the pole’s length. A Unilog has the added advantage of not having to look for a straight face to place against for the railing and they look very smart in the completed job. 

Square posts are used, however, the ‘off the shelf square posts’ are limited to the retained height. 

125 x 125 posts are readily available as they are classed as house piles complete with H5 treatment and are good to retain up to 900mm height at 1.20m pole spacing.

100 x 100 posts are also readily available as they are generally used for fence posts. The issue here is they are fence posts and have a H4 treatment which is certainly okay for a fence post, but a retaining wall? – I’ll let you be the judge on that one. We have replaced many paling fences where the posts have rotted at ground level generally after 25 to 30 years. A fence is easy to replace, but a retaining wall is a much bigger task and yes, we have done that also.

What is common is low retaining wall posts being incorporated as the fence posts above, and a shorter post placed halfway between each fence/retaining post, and yes, I have also been guilty of this work.

To have a H4 post treated to H5 costs approximately 25% more and of course waiting in the dreaded queue is what we all do not like.

A 100 x 100 post is only good to retain a maximum of 600mm at 1.20m spacing. It is always good practice to check the posts re knots or defects. The added advantage of square posts is that the joining of rails is not highly important to be completely butted up. With the installation of square posts, extra care needs to be taken to avoid any twist however, if a post is already slightly warped with twist, I tend to have it in line at halfway up the post.

Marking out for a wall if it is on a boundary

It is important to establish where the boundary line is to be in relation to the proposed wall and then marked out accordingly, bearing in mind width of pole, plus railing and lean back. Once this is established and pole centres are marked, it is recommended to set up a profile each end of the proposed hole line to the required lean back. 

It is important to carry out the drilling as accurately as practical, as it makes the pole placement so much easier, which in turn makes the railing easier obviously with a straight line of poles. To achieve this, we have a guider on the ground sighting between profiles and the digger operator can eyeball plumb when parked at 90° to the proposed wall line. 

The recommended size of hole is a minimum of 75mm of concrete cover around the pole. I like to work on 100mm concrete cover as it can make lining up poles easier particularly if we have bent and long poles.

Drilling and placing poles 

Most retaining walls have an intended lean back, which is generally shown on the plans and can be any of the following:

  • 1:20 = 50mm over 1.00m
  • 1:10 = 100mm over 1.00m
  • 3° = 50mm over 1.00m
  • 6° = 100mm over 1.00m

Pole placement 

The end poles and change of direction poles are the only ones that need to be securely braced both ways. A top and bottom string line is attached and line poles proceeded to be placed. For poles up to 2.40m long, we line up to the stringlines and then lean the poles up against the front of the hole and as we concrete, then hold the pole to the stringlines. For longer poles we line up to the stringlines then place a short piece of timber between the back of the pole and the top of the hole and drive a nail into the pole once lined up and plumb.

On completion of placing concrete the poles are checked for height and lifted if necessary, and also checking the top line as movement can happen during concrete placing.

With the construction of timber retaining walls, in most cases, poles will need to be trimmed to height this is because poles come in increments of 600mm lengths. It is also good practice when placing poles to be above the intended finished height and then a stringline is attached for all to see and be in agreeance of.

It is important when trimming the tops of poles, to apply an Ensele product, which is inexpensive and available from a local DIY store, as the treatment only has gone in so far. I have seen many walls with the tops of the posts being hollowed out due to decay.

We have done walls with larger square posts up to 300mm x 300mm but these obviously have to be produced which can take time.

My preference of wall is 125 x 125 dressed posts using 200 x 50 dressed rails and capping to match. Obviously, the posts need to be taken to a joinery firm to get dressed.

Steel I Beam

These are used for two main reasons:

  • Ability for higher retaining
  • Aesthetics

Classification of I beam comes as size (depth of beam) and kilograms per metre, for example a 200UB/22 is 200mm deep and 22kg/m. They come in 6.0m, 9.0m 12.0m, 15.0m, and 18.0m lengths. 

When organising I beams for a retaining wall, the following needs to happen:

  • Exact lengths established as it is not advisable to cut tops
  • A hole drilled or gassed in each end flange, for lifting in and out of the galvanising bath, plus also for lifting into and lining up once in the ground
  • Galvanising: partial dipping is acceptable as long as a minimum of 500mm is into the concrete encasement. Partial dipping costs are normally 60% of the beam weight, however, this depends on your local galvanising firm, as some don’t do it

A similar size I beam versus a timber pole

The I beam can take a higher retaining and also still looks appealing, whereby for example, a 450 SED pole at 4.0m high can look quite bulky. Once the beams are concreted in – say, immediately after the first concrete truck – it is important to lift them to the required height and carry out any ‘tweaking’ for alignment and plumb. There are times when the beam will not stay up, e.g., when using pumping concrete and a heavier beam. In this case, it is best to G clamp a timber across the flange of the beam.

Railing an I beam wall 

The rails are generally placed behind the front flange. Prior to this happening, a waterproof membrane such as Butathene is attached to the steel to stop the reaction between galvanised steel and tanalised timber. We have all seen what happens to gate gudgeons over time.

As it is not possible to attach the railing to the beam, it is imperative to have a strut/packer between the concrete and underside of the bottom rail to stop any vertical movement, plus must also be securely wedged between the two flanges.

Cast-In-Situ Concrete Piles

These are generally used for high walls with a high surcharge. The strength of the piles can be increased by the size of the reinforcing cage and diameter of the pile. When placing the reinforcing cage, plastic spacers need to be attached to maintain spacing in the hole.

For the above ground work, the formwork can be either cardboard formatube or metal fluming which can be easily removed.

Precast Concrete Piles

These are not so common due to the weight of the piles; however, we have used them. This was when they were precast – a recess was formed into the edges for precast waling to slip into. It also required our 30T excavator to lift the precast piles into the holes.

When cast-in-situ and precast piles are use, no lean back is required.  

Article provided by Nick Liefting 

Nick Liefting Contractors Ltd
nlcontractors.co.nz

Published in the Training & Events  Feature in WIRED Issue 67 / December 2022 by Fencing Contractors NZ

Read WIRED online

Follow us on Facebook

© Fencing Contractors Association NZ (FCANZ)


Read the other articles here:

Posted on

FCANZ members raise $15,000 for charity

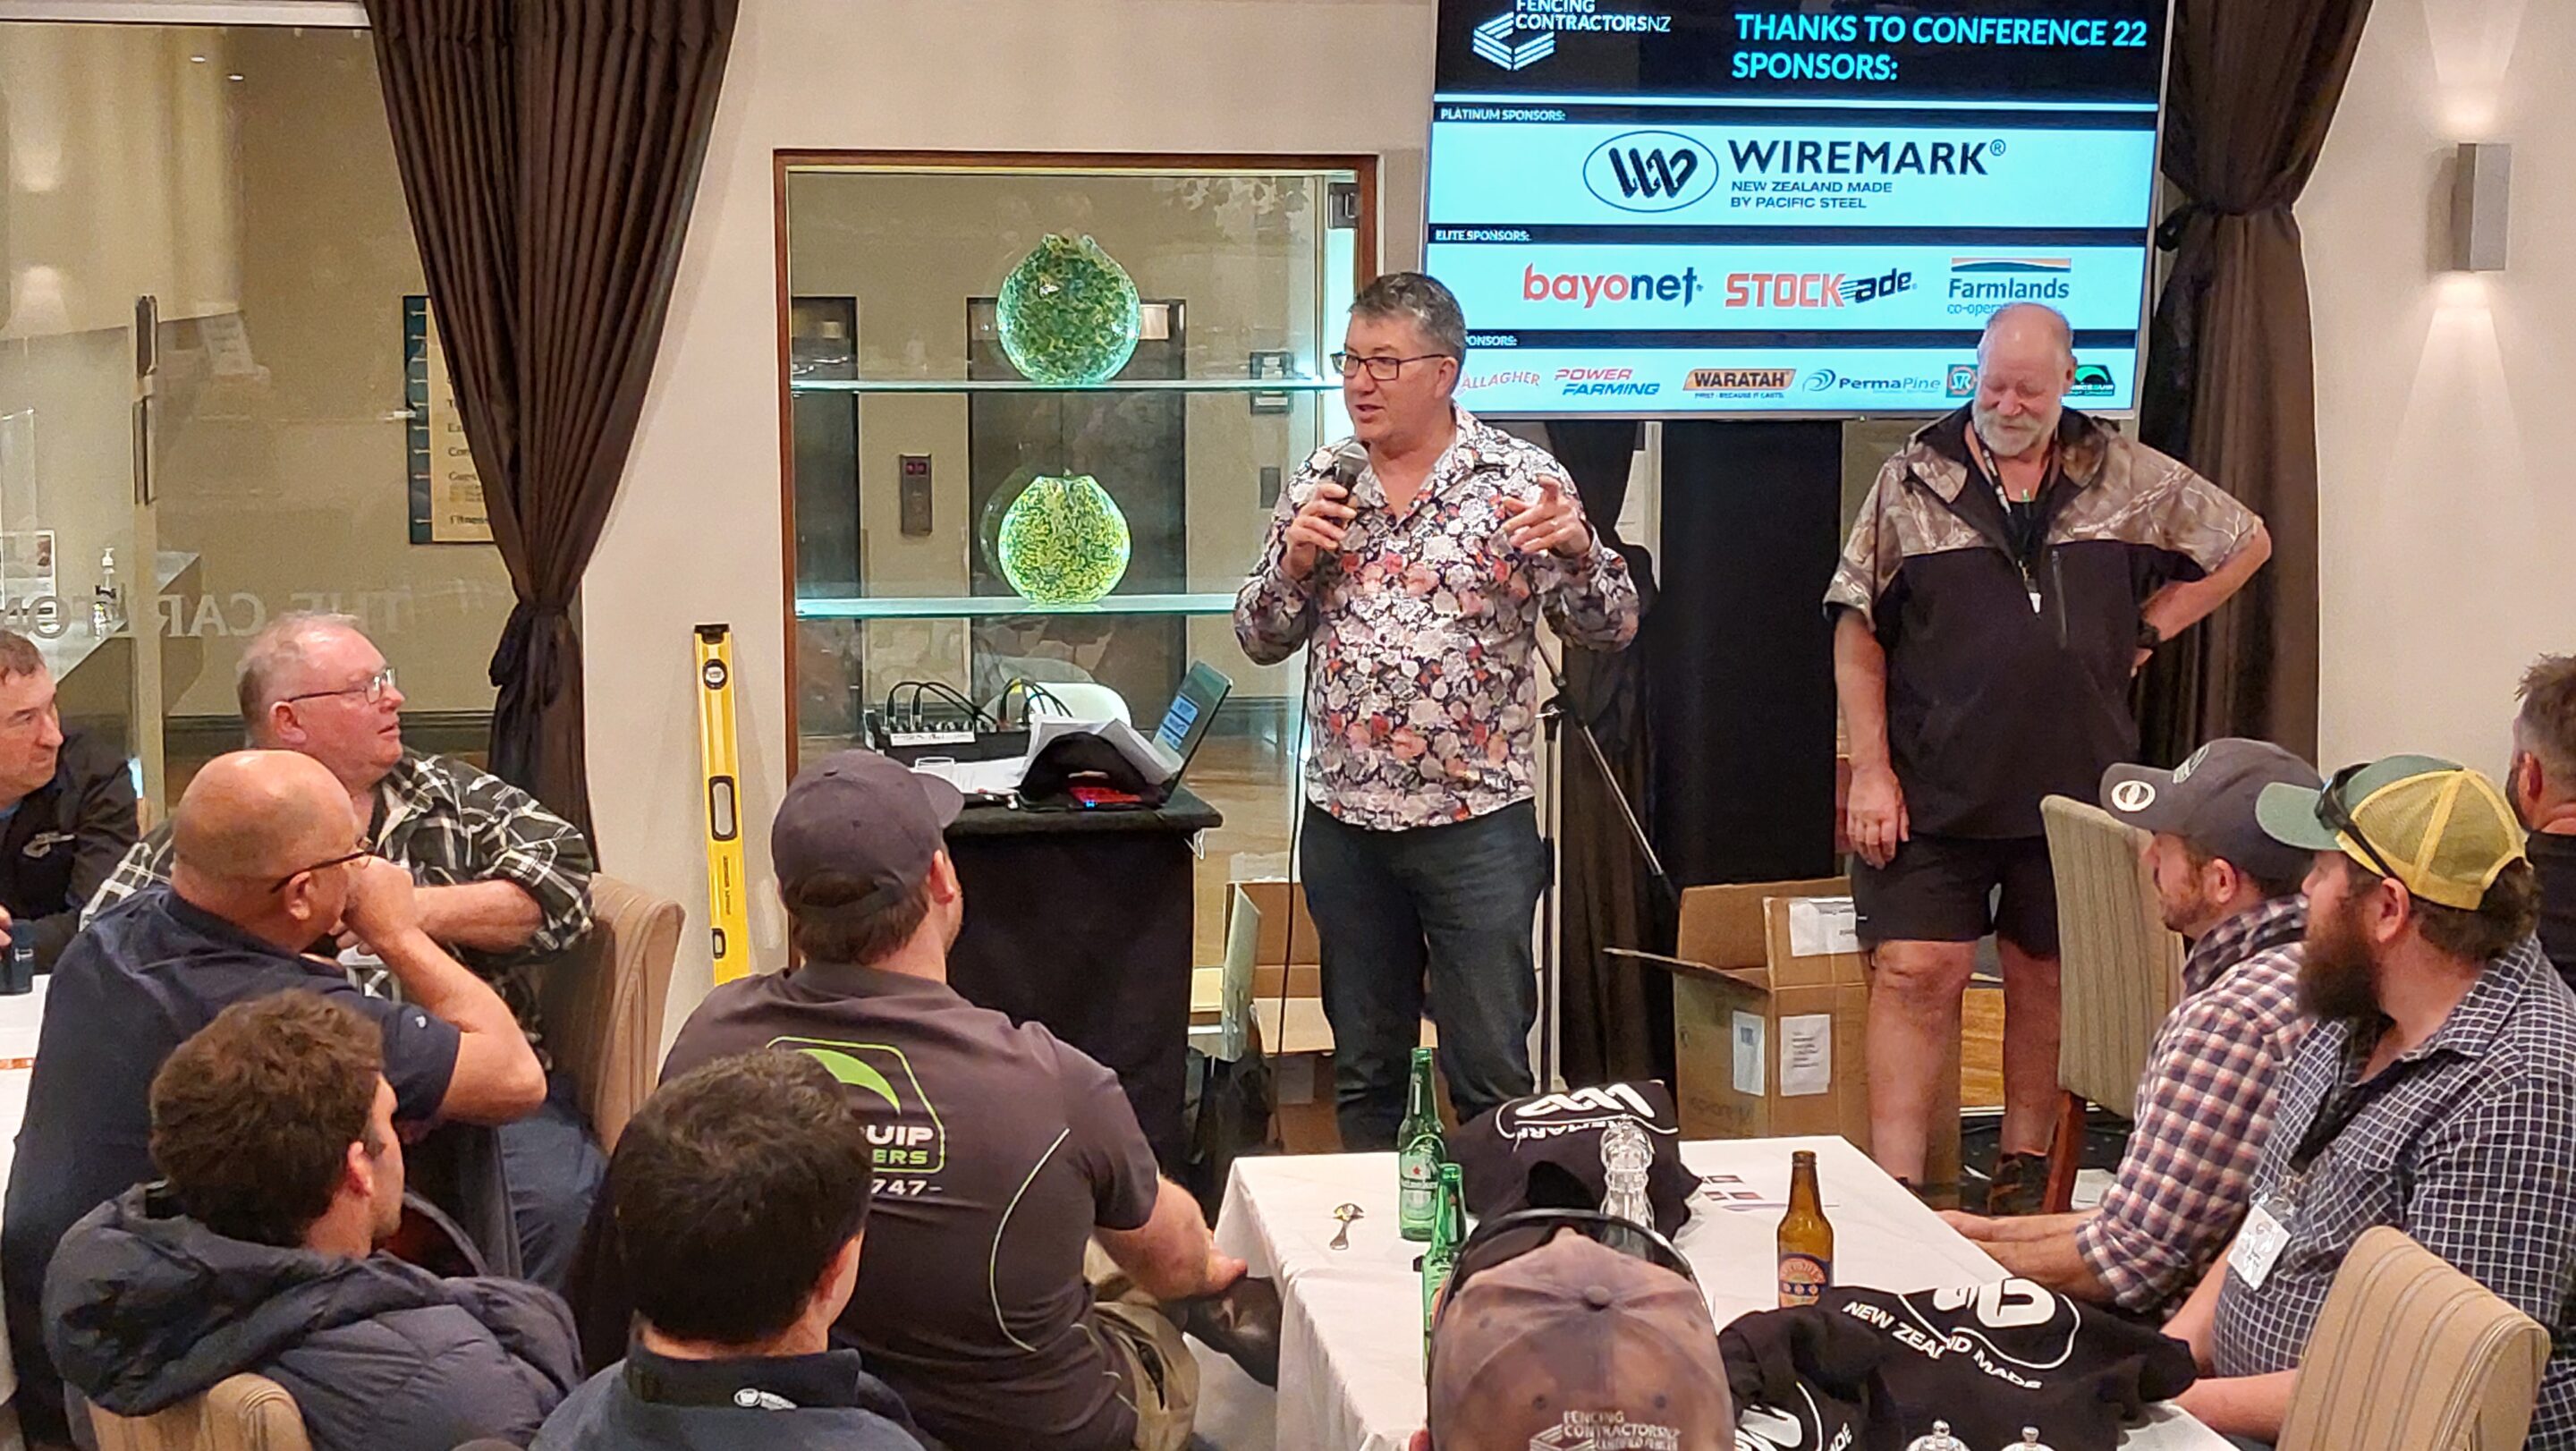
Fencing industry body Fencing Contractors Association NZ (FCANZ) recently presented the Whatever With Wiggy charitable trust with a $15,000 donation from its members. The funds were raised at an impromptu charity auction held at the recent FCANZ annual Conference, with Association Partners and some members donating the items to be auctioned.

“We were astounded by the generosity of not only our members for bidding on auction items but also for the support shown for this Charity by Association Partners who continued to donate items throughout the evening.” says Phil Cornelius, President of FCANZ.

Auction items ranged from tools, augers, wire, netting and Y-posts to white water rafting trips and even the shirt from the back of auctioneer Stephen Caunter. “The willingness for people to donate and bid shows just how highly they value the work that Wiggy is doing” said Cornelius.

Whatever With Wiggy founder Craig “Wiggy” Wiggins is an advocate for rural mental and physical health and champions Lean on a Gate, Talk to a Mate. Receiving news during COVID that a friend had taken his life, lead to the creation of the lean-on-a-gate movement. Wiggins says “Taking five minutes to check in with a mate, or young worker can reduce those feelings of isolation and could save a life. You never know – you just might help someone out.”

Wiggy also works closely with the Carr Family Foundation Rural Health and Wellness Van, which provides free health checks at rural events across the country. The van attended the FCANZ National Fencing Field Day in Mosgiel this year and saw almost 60 people across the day – of which over a quarter were referred to their GP for follow-up.

Phil went on to add, “The value of the work that Wiggy and his colleagues do can’t be underestimated and we look forward to seeing what we can achieve with the Charity Auction at our August 2023 Conference in New Plymouth. It is humbling to see how big the hearts are in the fencing industry.”

Auctioneer Stephen Caunter in full flow – before he auctioned the shirt from his back!

Read WIRED online
Follow us on Facebook

© Fencing Contractors Association NZ (FCANZ)

Posted on

Fencers have a Field Day in Dunedin

The FCANZ National Fencing Field Day was held on the Wednesday preceding the 2022 Conference and gratefully the weather played its part in a fine, near mild day without the high winds that cancelled and delayed so many flights into Dunedin on the Tuesday.

The Otago-Taieri A&P Showgrounds proved to be a valuable site, though it’s always hard to plan for an event on a site you have never laid eyes on. Certainly A&P Showgrounds infrastructure tends to suit our events. 

With around 20 exhibitors that service the fencing industry the site layout worked well with a Secondary Schools skills challenge down one end and the exhibitors lined up on the other three sides.

Exhibitors included Waratah, Beattie Insulators, Steel and Tube, Strainrite, Delfast, Boundaryline, FENCEQUIP, Edgesmith, Summit, Farmlands, Gallagher, Southland Farm machinery with Fencepro, Power Farming with Kinghitter, Bayonet, Stockade, Revolution Postdrivers, Activ Trailers, W.Rietveld Ltd (rock drilling) Stronghold and Micky Thompson tyres.

Discussion topics included a review of different types of footings, electrics, and rail work. Our thanks to Mark Lambert and Tony White for heading these, alongside MC John Noakes.

The Carr Family Foundation Rural Health Caravan ran checks on over 40 people – a sincere thank you to Craig Wiggins and Nurse Kirsten Barnes who carried out the health checks.

A number of competitions were run by FCANZ and exhibitors including Summit, Waratah, Strainrite and Stockade. 

This Field Day came together with help from the FCANZ Board, Jeanette, Jaime, local contractor Nick Terry and some of his crew members, Tony White and John Noakes. Chris and Sue Aspinall turned up on Tuesday and Wednesday to help, along with Angelina Beets. As they say, many hands make light work!

Results of the FCANZ Field Day Competitions 

Guess the weight of the Strainer (65.5kg)
Non member: Peter Graham (66kg)
Member: Andrew Abercrombie (62kg)

Stride/Distance (70.3m)
Aaron Sutherland (70.2) 

Hit the Nail
Jake Scott (3 hits) 

Waratah Guess the Staple (1049 Staples)
Danyel Watson (1001) 

Hammer Throw
Male: Ben Haugh (48m)
Female: Donna Upton

Javelin
Member: Jack Easen
Non-member: Michael Conijn
Female: Zoe Max

Waratah Wire Sculpture
Ez Fencing: Harold the Giraffe

Read WIRED online
Follow us on Facebook

© Fencing Contractors Association NZ (FCANZ)


Posted on

FCANZ to support formation of Sector Advisory Groups

FCANZ has had on its radar for a number of years diversifying the Association’s focus to include some of the other sectors that our members are involved in.  Sector Advisory Groups are one way of achieving this.

The member surveys that we have run over the past two years have helped highlight the variety of sectors that our members engage in. Over the years Board members such as Paul Fitzsimmons and Mike Renner have brought their knowledge and expertise, but more momentum and depth is required.

The Board has also recognised the need for better member engagement, with many of you having the skills to contribute to the continued growth of the Association, particularly in terms of supporting the Associations role in the industry and getting messaging through to our client base as to why use professional fencing contractors.

To get the process moving we are looking at the formation of the following Sector Advisory groups.

  1. Rural
  2. Residential
  3. Security
  4. Horticulture/Viticulture

These are the initial breakdown that we propose, and over time we can add other groups, especially if we find individuals who want to join together to advocate.

The purpose of the groups is to advocate for the sectors and grow sector representation and resources, whether it be:

  • coming up with ideas and suggestions to help promote these sectors to a range of clients.
  • adding to the partner database to include the growth of partners in these sectors.
  • specialized Best Practice Days
  • assisting in the development of industry/ best practice standards for the sector
  • contribution to training resources & events.
  • information sharing, communication, relationship building.
  • provide information and feedback to Executive Director and Board.

The Board encourages you to consider putting yourself forward to join up with one of these sector advisory groups. No matter your company size or your fencing experience (although high quality workmanship is a must!) we are looking for individuals who have good skill sets and want to contribute to our industry’s coverage and growth.

The advisory group composition is proposed as:

  • 3 – 5 volunteer representatives on each advisory group.
  • FCANZ to cover expenses if incurred
  • Online meetings (in an evening) or time to suit will be held at least 4 times a year with a minimum of 1 FCANZ Board member to attend each meeting.

Please email for further information or to express your interest.

Posted on

Variety is the spice of life

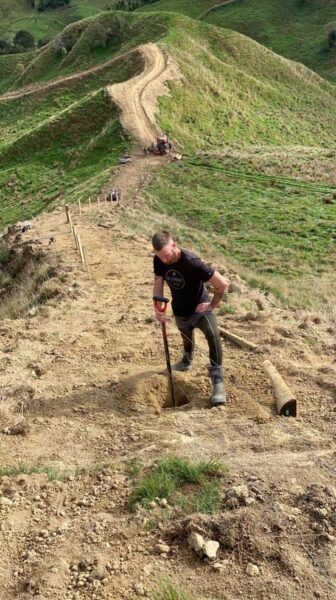
Jake Burns remembers growing up surrounded by all things fencing and farming –  he soaked it all up. At 15, he left school and began working for a local contractor in Matamata. It is safe to say that he loves the fencing life.

Jake’s dad, Bryce Burns, was a fencing contractor too. Bryce carried on farming but had hung up the wire strainers by the time Jake took up the tools 12 years ago. 

Fence work quickly took the teenager across the Waikato, down to Taranaki, over to Gisborne on the East Coast, and South to the Mackenzie Basin, then through the rest of the Mainland. He gained first-hand experience of the variety of terrain, environments, and fencing styles New Zealand has to offer.

“Gisborne is challenging land. Steep rough rugged country in the back blocks. At the time I started there, everything was done by hand because you couldn’t get a lot of machinery up into the hills. It was spade and hammer stuff. Physical work.” 

“Now, in Te Anau, the ground is hard. We use rock spikes and rock drills to blast through bedrock. Some people use explosives as well. It is definitely some of the hardest ground that I have fenced in. Steep in places, but mostly rolling hill country down to flat land. It took me some time learning how to fence in this ground coming from the Waikato. Up North, it is soft ground and beautiful soil. Down here, it is hard rocky ground, totally different.” 

Over the last decade, Jake has found what techniques work for him and developed his own style. 

“When I started fencing, I knew the basics. Then, as I moved around the country, I saw that many fencing contractors had their own ways of doing things. It was a great way to learn a lot of different fencing skills and techniques as well as what fence or wire work might suit one environment more that another. I love that variety.”

“Another great aspect of fence contracting, is that we are a curious bunch. It’s not unusual to have a bit of a yarn and share ideas about different fencing systems or the best tools we’ve used across various projects.”

Jake and his partner Chelsea George are now in the Te Anau Basin, having relocated near the end of 2021 while still in the sting of Covid restrictions.  Access to the great outdoors, hunting, and the good nature of Southland people were big parts of what drew them in. Jake started JB Fencing in August 2021.

“As a business, I focus on rural fencing and stock yards. I don’t expect to be the biggest fencing contractor in the region, but I want my reputation as a fencer to be built on the quality of my work, efficiency, and reliability.” 

Greg, Jake’s very first employer, encouraged him to go out on his own. 

“Greg is a very successful fencer himself. His confidence in my abilities helped me take the leap. I can call him up for advice which has been invaluable. Reaching out and getting to know local farmers and fencing contractors has also been really key to managing these early days of the business. Presently, I’m subcontracting as part of a crew on a big predator fencing project with waratahs and six-foot netting.”

As part of the new business set up, Jake purchased a Stockade ST400i cordless power stapler. 

“It is probably my favourite tool – I rate them. I’d used the ST400i a lot during several contracts around the country. I love the speed and reliability. By the time I can staple off two posts with a hammer, using the ST400i I would have already done four and it doesn’t bash up insulators like a hammer will.  It will shoot straight. It’s simple and there’s no mucking around.”

“Also, it’s so easy to use, when you have new staff, you can send them away with the ST400i and you know that the tool will do the job correctly.” 

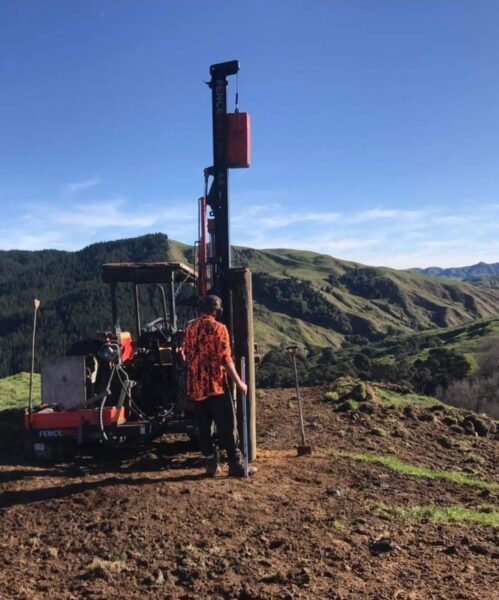
Still, moving into a new business was not without trepidation. Jake had moved to a new region, bought large ticket items including a tractor and post driver, and began building up a client base from zero. 

“The reward of starting my own business by far outweighs the risk. For me, it’s the reward of meeting new people, being my own boss and forging my own path, and I’m always still learning. There’s flexibility of working on your own or as part of a crew. I love do

ing a good job, seeing the finished product, and seeing people happy with my work. My hope is to build the business and take on staff — and I’d like to get some big station project work.”

“Fencing is a good business to be in.”  

Article supplied by Stockade

www.stockade.com

Read WIRED online

Follow us on Facebook

© Fencing Contractors Association NZ (FCANZ)

Posted on

5 tips for smooth sailing through client communication

Business Coach Daniel Fitzpatrick shares the client communication soft skills you’ll need to make sure your customers are thrilled with the end result, pay on time, and tell all their friends about you.

Ever found yourself at the finish line of a job but the customer still wanted more?

You did everything you could to get it right. Hustled to find materials. Answered their calls after hours. Agreed to meet them on site whenever they had concerns. 

If only they knew everything you’ve done to ensure a quality job.

So why are they complaining? 

  • Usually, the pushback is over workmanship.
  • But in most cases – the real cause is a breakdown in communication.

Here’s what’s interesting: If you can bring your communication up a notch – most complaints will disappear before they even begin. Saving you hours of extra work and stress. 

The secret is that great communication is proactive. From the first conversation with your customer to the final walkthrough to ensure they’re happy.

The good news? Communication is a skill. This means it can be learned. You can always be improving. 

Here are 5 winning strategies:

1. Invest in your onboarding (and win back your time)

Often we are too close to our work and assume that the client knows more than they do. Many clients have no idea what goes into a job. That’s why they’re often coming to you with queries as the job progresses.

Instead, set things up right: Create a brief “how we work” guide. It serves as a conversation starter on what clients can realistically expect.

This sets your standards from the outset and is something you can go through with every new client. Include things like:

The process – very clearly lays out each step including due dates of decisions they’ll need to make.

  • When and how they can contact you (eg you’ll reply ASAP but only during work hours).
  • When and how they can expect updates? Is it site photos, videos, or in-person walk-throughs?
  • When milestone meetings will be (these should be in person for bigger jobs).
  • What happens if progress payments are missed (ie. work stops).
  • What handover will look like?

Getting your onboarding right builds trust with customers and means they aren’t left in the dark about what’s coming next. So you’re free to work on the job itself. Without being bombarded with questions at inconvenient times.

2. Find the real issue (if they’re getting too involved)

What if the customer starts questioning your work? It’s a familiar scenario: They’ve spent 2 minutes on Google or chatted to a builder mate. Now they’ve got some “helpful tips” for you. 

They think they know better when you’ve been in the trades your whole working life! It’s perfectly natural to feel frustrated – but it won’t make things better.

These customers probably just heard too many stories. From people with leaky homes, or who had a bad reno and told them all about it.

You can stay in control by digging deeper: Ask them what they’ve heard. Uncover their main concern. Repeat back to them to make sure you understand. 

Then explain your process and why what they are afraid of won’t happen. You’ll diffuse the situation, and make them feel reassured they’re in safe hands.

No doubt about it: When potential issues crop up during the job, clear and transparent communication is a must. Be in touch early and often.

3. Learn to say no to the clients you don’t want

Some customers are, of course, more trouble than they’re worth. 

We’ve all been there: They didn’t pay on time. Had unrealistic expectations. Maybe even got aggressive. They definitely complained about everything. 

The trick is to be clear about what your ideal client looks like – so you can quickly recognise the ones you don’t want. Look: It’s okay to turn down work. Just because someone offers you work doesn’t mean they’re a good customer.

Make sure you notice any red flags when you first chat with clients. Have they had problems with other tradies before you? Do they want the job done yesterday? Do they complain about their neighbours even? These might be signs they’re difficult to deal with. 

You’ll need to test if your assumptions are correct. If they are, be the nice guy with a backbone. Tell them your company isn’t the right fit for this work. Avoid the temptation to explain these signs away; you’ll thank yourself later.

4. Separate yourself from the rest

Most tradies aren’t concentrating on delivering great communication. It’s an easy opportunity to get ahead of your competition.

You can easily wow and delight customers if you just do a few small things right: 

  • Tell your clients about the things you aren’t charging them for. Like when you encounter a hiccup and have to spend extra time spent prepping the job.
  • Arrive on time, or if running late, text an update. (81% of customers find lateness highly unprofessional. Don’t get off on the wrong foot.)
  • Explain things in their terms. (If your mum wouldn’t understand it, they probably won’t either.)
  • Train your crew to be extra polite – please, thank you, excuse me. No swearing.
  • Treat their property like your own. Remove rubbish. Leave the site better than you found it.
  • Give a final handover worthy of their investment. Take your time, walk them through, show them all that went into the job. Any niggles can be easily squashed.
  • A quick courtesy call to follow up after completion.

Make “looking good to the customer” a team mission. 

And educate staff on the actual value of a customer. Show them how much it costs to acquire new customers. You’ll get more effort and buy in from them when they understand this.

5. Build a team your customers love

As your team grows, it gets harder to keep consistent standards on all jobs. Quality slips. Mistakes happen. 

Still, it’s your reputation on the line. You’re the one explaining it to the customer. 

That’s why when tradies come to me for business advice, one of the first things we look at is team performance. Getting everyone on the same page and improving individually and as a team. 

You need to have good systems and rules for your crew so things aren’t missed. Send your team into jobs fully loaded: Use detailed job folders, set processes for the way things should be done, and quality control checklists.

Have clear standards and expectations that your team is accountable to – and rewarded for. This helps your staff take ownership. (Those with attitudes will either step up or step out.)

Getting these operating systems right means you can be away from site without worrying what is going on. Keep tabs on the right things – then you or your foreman can intervene early if issues crop up.

With these things in place, you can deal with problems before the client ever sees them. Less re-work and complaints. No squabbles over the bill. 

Ultimately: Put a bit of extra effort into communication and you’ll quickly become known as the best. Expect 5-star reviews, good recommendations… and bigger and better jobs with clients you enjoy.  

Article supplied by Daniel Fitzpatrick

www.nextleveltradie.co.nz

Published in Business, Health & Safety, Environment in WIRED Issue 66 / September 2022 by Fencing Contractors NZ

Read WIRED online
Follow us on Facebook

© Fencing Contractors Association NZ (FCANZ)
Posted on

Safety and PPE

What is your duty? A reminder for PCBU and Officers/Directors. Employers MUST pay for Personal Protective Equipment (PPE).

Every employer shall ensure that suitable personal protective equipment is provided to their employees who may be exposed to a risk to their health or safety while at work except where and to the extent that such risk has been adequately controlled by other means which are equally or more effective.

You cannot pass on the cost of providing PPE (in full or part) to your workers. 

You cannot make your worker provide their own PPE as a condition of employment. 

Even when a worker provides his or her own PPE, the employer must ensure that the equipment is adequate to protect the worker from hazards at the workplace.

“I’m not their mother” no excuse for lax health and safety

In a recent WorkSafe prosecution, a Kaikoura fencing contractor was convicted and ordered to pay costs for failing to provide appropriate eye protection for an employee. 

The agricultural fencing sole trader had a 17 year old worker who was chiselling when a piece of metal flew into his right eye in March 2020. Despite multiple surgeries, the teenager lost sight in the eye. 

The fencing contractor did not notify WorkSafe of the injury, as required, but several months later the victim’s mother did, triggering an investigation. 

The contractor was charged under the Health & Safety at Work Act and in July 2022 was sentenced to pay $22,500 in emotional harm and consequential loss in the Kaikoura District Court. 

When a WorkSafe inspector asked the fencing contractor whether he told workers to use protective gear, his response was: “I’m not their mother and going to dress them every morning”.

It was confirmed that he had not provided full instruction to the victim on the use of personal protective equipment (PPE), such as safety glasses, because in his words “it was common sense”.

He also indicated to WorkSafe he felt it was too expensive to buy PPE, saying: “I’m too small for that sort of… carry on”.

WorkSafe’s national manager of investigations, Hayden Mander says the employer’s comments reflect an outdated, unacceptable, and cavalier attitude.

“A young man at the start of his working life now has seriously impaired vision. It’s astounding for an employer to not understand the seriousness of the situation.”

“The cost of health and safety is part of the cost of doing business. The worker should have been provided with appropriate PPE, including eye protection, and required to wear it when using a chisel and hammer or any other task where there is a risk of an eye injury.”

Workers who are vulnerable because of age, inexperience, or conditions of employment may be less likely to question health and safety practices or to speak up if they are unsure.

“Beyond the obvious health and safety gaps in this case, it’s both illegal and morally wrong for an employer of any size to not notify WorkSafe of an incident like this. No employer is exempt,” says Hayden Mander.  

WorkSafe prosecution: 

  • Judge Raoul Neave ordered $22,500 be paid to victim for emotional harm and consequential loss
  • The fencing contractor was charged under sections 36(1)(a), 48(1) and (2)(b) of the Health and Safety at Work Act 2015 being a person conducting a business or undertaking (PCBU) having a duty to ensure, so far as reasonably practicable, the health and safety of workers who work for the PCBU, while workers were at work in the business or undertaking, namely while erecting a fence, did fail to comply with that duty, and that failure exposed workers to a risk of serious injury.
  • The maximum penalty is a fine not exceeding $300,000.
  • The fencing contractor was also charged under sections 56(1) and (6)(a) of the Health and Safety at Work Act 2015 being a PCBU who became aware that a notifiable event arising out of the conduct of the business or undertaking occurred on 12 March 2020 (the notifiable injury), failed to ensure that the regulator, WorkSafe New Zealand, was notified of the event as soon as possible.
  • The maximum penalty is a fine not exceeding $10,000

Article supplied by Rural Safe

www.ruralsafe.co.nz

Published in Business, Health & Safety, Environment in WIRED Issue 66 / September 2022 by Fencing Contractors Association NZ

Read WIRED online
Follow us on Facebook

© Fencing Contractors Association NZ (FCANZ)

Posted on

How to: Retaining walls

In this second instalment of our focus on retaining walls, Nick Liefting explains the conditions under which Retaining Walls are exempt from building consent. 

Consent for retaining walls

Retaining walls that do not require a building consent under the Building Act 2004 are as follows: 

Retaining walls up to 1.5 metres depth of ground:

The Building Act 2004, Schedule 1, Exemption 20 allows you to build a retaining wall (which is any wall constructed to retain or support the surrounding ground) without needing to get a building consent as long as it does not retain more than 1.5 metres (vertically) of ground and it includes ground water drainage in relation to retaining walls.

This exemption does not apply to retaining walls that are subject to any additional load or surcharge such as:

  • vehicle driveways
  • parking spaces
  • swimming pools
  • buildings
  • other retaining walls
  • sloping ground above the top of the retaining wall

If the ground above the top of the retaining wall is only gently sloping, this may not be considered as ‘surcharge’.  To determine the impact of the sloping ground and its pressure on the stability of the proposed retaining wall, you may wish to seek professional advice, for example, from a Chartered Professional Engineer.

Examples:

What is exempt? 

  1.   A builder plans to reconstruct an earthquake-damaged timber retaining wall that is less than 1.5 metres high. There is no surcharge on the retaining wall, so a consent is not needed.
  2.   A motel owner decides to terrace the motel’s uphill sloping section by building three, 1.2 metre high concrete crib retaining walls to create three level platforms, each of which will be planted. As there will be sufficient horizontal separation between each of the retaining walls so that no surcharge load will be imposed on a lower wall, no building consent will be needed.

What needs consent?  

  1. An owner wishes to form a level platform for a garden below a neighbour’s driveway. To do this, she intends to construct a 1.2 metre high retaining wall.
    As the proposed retaining wall is subject to a surcharge from the neighbour’s vehicle driveway, it will require a building consenT
  2. A retaining wall ranges in height from 900 millimetres to 1.8 metres. The part of the retaining wall that exceeds the maximum allowable height of 1.5 metres will require a building consent.
  3. Retaining walls with surcharge regardless of height. 

Retaining walls up to 3 metres depth of ground 

The Building Act 2004, Schedule 1, Exemption 41 exempts retaining walls designed or reviewed by a Chartered Professional Engineer of up to 3 metres and in a rural zone, as long as they are not too close from the boundary or existing buildings. This exemption recognises that in low-density rural zones such as farms, the consequences of failure of any retaining wall are less likely to cause injury than they would be in higher density urban environments. The additional requirement for a Chartered Professional Engineer to be involved also helps to make sure that retaining walls covered under this exemption are less likely to fail.

Examples:

What is exempt?

  1. Constructing a retaining wall on a rural property that is 2.5 metres high, 3 metres away from an existing dwelling, and is designed by a Chartered Professional Engineer.
  2. A farmer decides to rebuild an earthquake-damaged retaining wall on their rural property that is 3 metres high and located 6 metres away from a legal boundary. The wall design has been reviewed by a Chartered Professional Engineer.

What needs consent?

  1. Constructing a retaining wall on a rural property with a height of 3 metres, 1 metre away from an existing dwelling and designed by a Chartered Professional Engineer. A building consent is required because the wall is closer to the dwelling than its own height.
  1. Constructing a retaining wall on a rural property that is 3 metres high and 5 metres away from the property boundary which has been designed by an engineer, but not a Chartered Professional Engineer. Though the retaining wall is not located closer to a legal boundary than its own height, a building consent is required as the wall has not been designed or reviewed by a Chartered Professional Engineer. 


Article provided by Nick Liefting 

www.nlcontractors.co.nz


Published in Training & Events in WIRED Issue 66 / September 2022 by Fencing Contractors NZ


Read the other articles here:

Read WIRED online
Follow us on Facebook

© Fencing Contractors Association NZ (FCANZ)

Posted on

Keys to a healthy mindset

The easiest and fastest way to keep a healthy mindset is to make sure we’re cleaning out the ‘little stuff’ before it becomes ‘big stuff’.

If we don’t clean our minds of the little niggles early on they tend to pile up and get out of control to the point where they can become overwhelming. By taking actions daily we’re going to eliminate small unwanted negative thoughts building up to become big all-encompassing negative thoughts.

3 key steps to a healthy mindset are as follows:  

1. Focus

This is the most important thing to maintain a healthy mindset, because where you focus your energy and attention is exactly what you’ll get more of. 
By focusing on what’s wrong, we’re going to find more of what’s wrong. If we’re able to focus on ways to resolve a problem or challenge then we’re going to look for opportunities and other ways to resolve the problem or challenge we have. It takes a conscious effort to focus on what’s right versus what’s wrong. Ask yourself better questions like “What am I missing here? What am I not yet seeing? What’s a better way?” 

What’s WRONG is always available, but so is what’s RIGHT.  

2. Meaning

The meaning we give to any situation is 100% responsible for how we see the way through it (or seeming like there is no way through it). 

If we’re looking at an issue and then we say to ourselves ‘this is going to be hard’, or ‘it’s annoying’, or ‘it’s frustrating’, then we’re going to end up focusing more on hard, annoying or frustrating. 

What we want to do is apply an empowering meaning to any situation. We want to look at how the situation is going to benefit us, or make us stronger, or make us better, or give us a lesson which will help streamline our life/business. 

On a deeper level if we say ‘this means I’m failure’, or ‘this means I’m not worthy’, or ‘this means I’m not good enough’, then this is going to produce a more negative state of mind. By shifting the meaning to something more empowering, such as ‘there is a lesson here’, or ‘this is a weakness I need to work on’, or ‘this will help me become better at what I do’, then it means we will look for ways to grow and strengthen ourselves. And as we grow and strengthen our self we are then able to have a stronger mindset. 

Only EVERYTHING has the meaning we give it. 

3. Communication

How we communicate is very important to the outcome that we want. It is not just the way we communicate with others such as staff members or family, it’s very important to understand how we communicate with ourselves. The things we say to ourselves when we are by ourselves are the most dangerous things we will ever hear. Because if we’re putting ourselves down, saying ‘I’m a failure’, or saying ‘I’m hopeless’, or saying ‘I am no good’, then this will lead to more self-doubt, low self-worth and low self-esteem. When we shift the internal dialogue again to empowering statements, then we build up our self-worth, and self-esteem, and self-confidence. And isn’t it true when we are confident we believe we can handle any situation? 

When we are speaking to others communication is also very important because the words we use directly are only responsible for 7% of how the communication is received, 38% of it is actually the tonality in which it said, and 55% is the physiology in which we hold ourselves. So if we are frustrated, angry or overwhelmed, our physiology reflects that, and the people we communicate with read our physiology more than the actual words we speak. If we are upbeat, or optimistic then our physiology reflects that and we will be more approachable and the conversation will be much more constructive. 

Applying the three key steps to a Healthy Mindset will mean when we are stressed (and we will all face some sort of stress) then we can handle the stress with ease.  
What can we do to lower and eliminate the stress that has been caused by not maintaining a healthy mindset?
Prevention is the best medicine – every day we should apply these three ‘Daily Reflection Questions’:

  1. What was most stressful today?
  2. How well did I handle it?
  3. What will I do differently next time?

If we are caught up in a negative mindset and need to process a situation, ‘Ask Better Quality Questions’:

  1. What is working well?
  2. What am I not seeing here?
  3. What is another option here?

Written by Shane Bird

www.shanebird.com
Shane Bird Coaching


Published in Training and Events in WIRED Issue 66 / September 2022 by Fencing Contractors NZ